We've been adding a lot of new functionality and documentation so it's time to try to answer the question: What is the best way to get started with BlurbBits?
First make sure you've read our introduction or the BlurbBits Basics to get a high level understanding of our basic capabilities and concepts. It also helps to understand how to create a BlurbBit (url parameters, our interactive examples and publishing options). Remember our goal is to reuse as much information as possible, so check out our data extraction parameters before you start. We even document a complete geoblogging process but it helps if you understand the high level summary first..
BlurbBits - summary
BlurbBits are performance optimized map and photo sharing solutions for your blog or website. Standalone BlurbBits define a map and/or set of photos for a specific location or topic (the bits). Instead of adding photos one by one (a major hassle) and/or linking to a separate map or photo album, BlurbBits can be used to quickly add all the photos/map into a blog or website. Photos and maps are viewed directly within the BlurbBit on your page without forcing users to other sites or pages. Extract BlurbBits summarize data from various sources into overview maps and/or albums depending on the parameters.
- Quick customized maps (standalone)
 You can adjust markers, zoom levels, location, travel path, map type and initial view. These parameters are also used to customize extracted maps. Location maps (&llz) also define a blog post's location when added to an individual blog post.
 - Online photos (picasa or flickr)
 Manages multiple photos from Albums or sets, with or without geotagged data from a user, group or other public data (does NOT define a blog post location). Changes made to the online photos will be seen when the BlurbBit is reloaded, automatically keeping your blog photos up to date.
 - Combined Maps and Photos
 The parameters from the sections above can be combined into a single BlurbBit which shows photos and defines a blog post's location. This can be used to manage all the photos and map for your blog post in a single utility (ie. widget/gadget) while allowing us to map your blog posts.
 - Summarize Data
 Create summary maps/photos from existing data using extraction options. Note: extracted data cannot be used to define a blog post's location, it must be defined using the LLZ map parameter (or via the mapr).
 - Publishing Options
BlurbBits can be added to your blog (post or sidebar), website or emailed and linked using our publishing options. Use the Embedded Options (and Blogger BlogThis) to add a BlurbBit into a blog or website. Links can also be used in sites/blogs that don't support javascript. Our Gadget overload post might help you understand our thoughts on post vs sidebar publishing.
Utilities & Tools
BlurbBit Interactive Examples (in this Blog)
 The interactive examples of the various sections can be used to learn about a specific set of BlurbBit features. Click on the
 Design Mode (within a BlurbBit)

A BlurbBit in design mode displays the publishing options for the i (info) menu button instead of the standard info/sharing options. The interactive examples and the BlurbBits Mapr automatically enable design mode. Url parameters can be manually appended to the BlurbBit Url and published using this mode.
Dynamic GeoBlog Maps
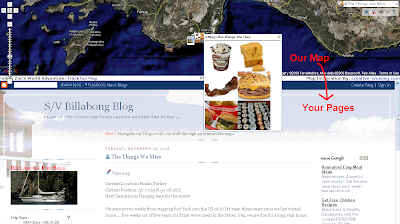
 Blog Before Dynamic Maps
 Blog After - with Popup Map Displayed
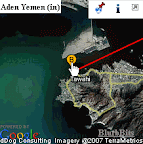
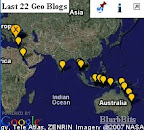
 Dynamic Geoblog Maps are created on the fly based on a specific pages content. A popup map (within the page) is created for each geo-located post along with a dynamic GeoBlog summary map for the pages content. Update: we've added some new functionality which will enhance your blog's performance even further.
BlurbBits Mapr

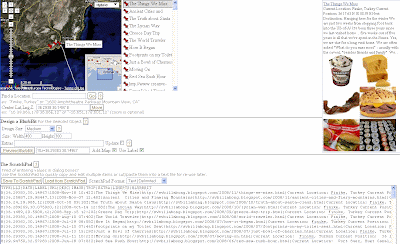
The BlurbBits Mapr has two purposes; to create & position multiple standalone BlurbBits and extract & position existing data via RSS feeds or the scratchpad. Existing online content can be extracted using Url parameters and the interactive examples can be easily added to a location to map it (using the extras dialog box). Scratchpad data can be published to the web via Google Spreadsheets and extracted into BlurbBits (a quick summary) and the BlurbsViewr (interactive navigation map).
BlurbsViewr

The BlurbsViewr uses the Url parameters (photos and extracted) to display objects on an interactive map. The map stays persistant while pages are opened below, making it a perfect tool to navigate your geo-referenced data. Use the Scratchpad/Google Spreadsheet to define your own data or combine multiple sources.
GeoBlogging Process
All of the above functionality can be used as a complete geoblogging process that supports remote posting, post centered photos/maps, and interactive Blog map, Dynamics maps and mapping of historical data combined with other websites (for a Travel blog, geotagged photo blog, any geospacial data-- geoblog). With Blogger you have a lot of mapping options that are great for combining with existing sites. Best of all it's free.. try it today!!
Start by playing with the interactive examples to see what standalone BlurbBits you can add (they are the fastest way to improve your site and see what data you already have). Get a basic understanding of the Mapr and the geoblogging process before you go too crazy.
What data do you have?
Photos in Flickr or Picasa work best with albums/sets and can be filtered further using tags to match content or location. Captions will automatically be added if available and remember you don't have to add/edit EVERY photo, they can become just like gadget overload if you are not careful. The mapr is the easiest way to combine photos with a map (to define a post location). If you use Picasa Web Albums, map them in Picasa first and use the Mapr to build a BlurbBit map Album.
If you just want to build an interactive map of your website/blog use the Mapr ScratchPad, at some point you'll need to define each location. If you have existing data you can reuse it by supplying the correct extraction parameters to the Mapr. The scratchpad is just that, so make sure you save the data so you can reuse it later. Try mapping a couple of locations and working through the process before you do them all.
Create a Travel Log
You can easily map your travels by building an electronic travel log in a Notepad text file (like this). Use the BlurbBits Mapr to Load the Scratchpad data (cut & paste your text), If you don't know your location, leave it blank, you can find it using the Mapr Find a Location features. Adjust the positions and set your zoom levels to highlight the correct area (zoom=8 middle of the ocean zoom=12 or 15 for anchorages with good maps). You'll need to upload the file into a Google Spreadsheet in order to map it in the BlurbsViewr.
Later, if you want, you can add photos and links to other pages, like your online photos, your website, wikipedia, or combine it with your Blogs (like this). Creating a BlurbBits enabled blog is the most automatic way of tracking your travels but using the travel log is a great start and it sure beats entering position after position into dialog boxes.


0 Comments:
Yorum Gönder